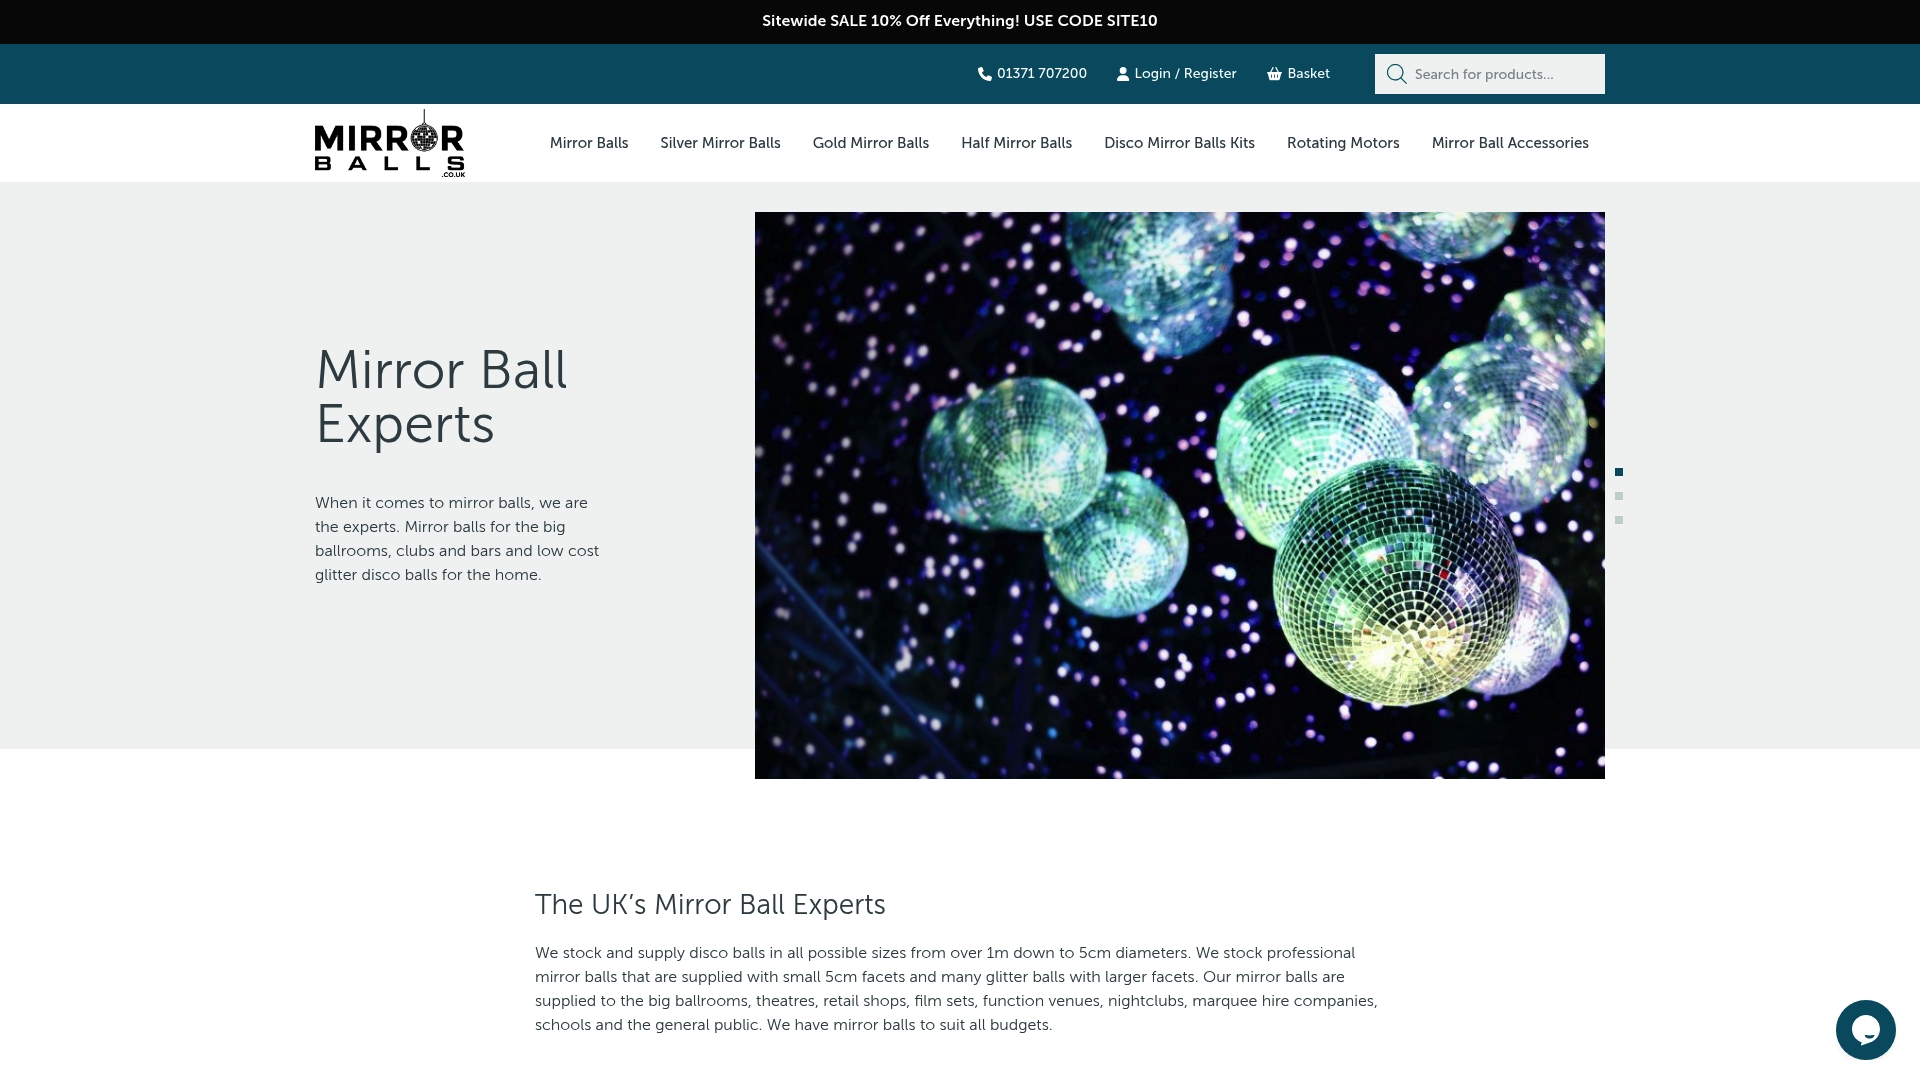
Most british venues aiming for that classic disco sparkle know a mirror ball can change the mood of any event within seconds. Yet, with all the excitement, many overlook that one weak ceiling anchor could put hundreds at risk. Understanding the unique challenges of british spaces is the first step toward a safe and impressive installation. This guide offers practical insights to help you choose, mount, and light your mirror ball with confidence, whether you are equipping a grand hall or a cosy living room.
Table of Contents
- 1. Assess The Venue And Ceiling Structure
- 2. Choose The Right Mirror Ball Size And Accessories
- 3. Select A Secure Mounting Point And Hardware
- 4. Install The Motor Safely And Test Operation
- 5. Position Lighting For Optimal Reflection Effects
- 6. Check Power Supply And Remote Controls
- 7. Perform A Final Safety And Functionality Inspection
Quick Summary
| Takeaway | Explanation |
|---|---|
| 1. Assess Ceiling Structure Thoroughly | Check the ceiling’s composition, height, and load capacity to ensure a safe mirror ball installation. |
| 2. Choose Appropriate Mirror Ball Size | Select a mirror ball that matches the venue’s dimensions for optimal lighting effects and aesthetic appeal. |
| 3. Use Quality Mounting Hardware | Ensure all mounting components are rated for safety to prevent failures during operation. |
| 4. Test Motor and Electrical Systems | Properly install and test the motor and electrical components to ensure reliable functionality during events. |
| 5. Conduct a Final Safety Inspection | Perform a systematic check of all components to guarantee safety and functionality before the performance begins. |
1. Assess the Venue and Ceiling Structure
Preparing for a spectacular mirror ball installation begins with a thorough assessment of your venue’s ceiling structure. This initial step is crucial for ensuring a safe, secure, and visually stunning display that will transform your space into an electrifying environment.
The ceiling’s material, height, and load-bearing capacity are fundamental considerations when planning your mirror ball setup. Structural integrity determines whether your chosen mirror ball can be safely suspended. Concrete, wooden, steel, and drop ceiling structures each present unique challenges and installation requirements.
Start by measuring the precise ceiling height and available hanging points. Professional venues like nightclubs and theatres typically have robust mounting infrastructure, while home spaces might require additional reinforcement. Look for sturdy ceiling joists, support beams, or dedicated rigging points capable of supporting the mirror ball’s weight.
Key inspection points include:
- Ceiling material composition
- Maximum weight load capacity
- Number and spacing of potential mounting points
- Accessibility for installation equipment
- Proximity to electrical sources
For venues with complex or unfamiliar ceiling structures, consulting a professional rigger or structural engineer can provide expert guidance and prevent potential safety risks. Remember, a meticulously planned installation not only ensures spectacular visual effects but also guarantees the safety of everyone underneath your dazzling mirror ball display.
2. Choose the Right Mirror Ball Size and Accessories
Selecting the perfect mirror ball involves more than just aesthetic appeal. Your chosen mirror ball must harmonise with your venue’s dimensions, lighting setup, and intended atmosphere.
Mirror balls come in a range of sizes typically between 4 and 50 centimetres. Venue size and purpose are critical factors in determining the ideal diameter. Small home parties might benefit from compact 10 centimetre balls, while large nightclubs and performance spaces require substantial 40 or 50 centimetre installations that create dramatic lighting effects.
When considering your mirror ball, examine these crucial selection criteria:
- Ceiling height and available hanging space
- Room dimensions
- Intended lighting effect
- Ambient light conditions
- Budget constraints
Accessories can dramatically enhance your mirror ball’s performance. Motor kits enable continuous rotation, creating mesmerising light patterns, while specialised lighting systems like pinspot lights or LED colour changers can transform your space. Comprehensive mirror ball accessories provide professional insights into expanding your setup’s visual potential.
Pro tip: Always select a mirror ball slightly smaller than your available ceiling space to ensure safe and aesthetically pleasing installation. This approach guarantees optimal visual impact without compromising structural integrity or safety.
3. Select a Secure Mounting Point and Hardware
Selecting the right mounting point and hardware is absolutely critical for a safe and successful mirror ball installation. The wrong hardware could lead to catastrophic failures that risk both equipment damage and personal safety.
Mounting hardware selection involves understanding load bearing capacities, structural compatibility, and precise weight distribution. Professional venues require specialised rigging equipment like steel safety cables, robust swivel mounting brackets, and load rated suspension points that can withstand significant dynamic movement.
Essential hardware components include:
- Steel safety cables
- Swivel mounting brackets
- Load rated suspension points
- Quick link connectors
- Ceiling mount adapters
- Weight rated carabiners
Before installation, conduct a thorough structural assessment to determine the maximum weight your mounting point can safely support. Different ceiling materials steel, concrete, wooden joists require specific mounting approaches. Professional rigging techniques can provide comprehensive guidance on selecting appropriate hardware.
Pro tip: Always use redundant safety attachments. Your primary mounting point should be supplemented with secondary safety cables to prevent potential catastrophic failures. This multilayered approach ensures maximum security and peace of mind during your mirror ball installation.
4. Install the Motor Safely and Test Operation
Mirror ball motors are precision instruments that transform static disco balls into dynamic lighting features. Proper installation requires meticulous attention to safety and operational parameters.
When mounting your mirror ball motor, critical structural considerations are paramount. Load bearing specifications mandate that the installation area must support a minimum point load of 10 times the device’s weight. This ensures stability and prevents potential equipment failure.
Motor installation steps include:
- Verify ceiling structural integrity
- Select appropriate mounting brackets
- Confirm electrical compatibility
- Align motor precisely
- Secure all connection points
- Test rotation mechanism
Before final installation, conduct a comprehensive operational test. Rotate the mirror ball through its full range of motion, checking for smooth movement and listening for any unusual mechanical sounds. Ensure electrical connections are secure and the motor responds correctly to control inputs.
Pro tip: Always use redundant safety attachments and inspect mounting hardware regularly. A seemingly minor installation error could result in significant equipment damage or potential safety risks. Patience and precision during setup will guarantee a spectacular and safe mirror ball performance.
5. Position Lighting for Optimal Reflection Effects
Creating mesmerising light displays requires strategic lighting placement that maximises your mirror ball’s reflective potential. The interplay between light sources and mirror surfaces transforms ordinary spaces into dynamic visual experiences.
Lighting positioning fundamentals involve understanding angles, intensity, and colour spectrum interactions. Pinspot lights work exceptionally well for concentrated beam effects, while colour changing LED systems provide versatile illumination options. Spotlight techniques can dramatically enhance the mirror ball’s visual impact.
Key lighting placement strategies:
- Position lights at 45 degree angles
- Use multiple light sources
- Experiment with colour temperatures
- Consider ambient room lighting
- Select appropriate wattage
- Test different beam widths
When setting up your lighting, remember that distance and angle are critical. Lights placed too close create intense hotspots, while those positioned too far produce weak, scattered reflections. Aim to create a balanced distribution of light that allows your mirror ball to generate intricate, sweeping light patterns across walls and floors.
Pro tip: Always conduct a preliminary lighting test before your event. Walk around the space and observe how light reflects from different positions, making subtle adjustments to achieve the most spectacular visual effect.
6. Check Power Supply and Remote Controls
Ensuring proper electrical compatibility is a critical step in mirror ball setup that many enthusiasts overlook. Electrical mismatches can lead to equipment damage or complete system failure.
Voltage compatibility is paramount when preparing your mirror ball system. Carefully verify power supply specifications to prevent potential electrical mishaps. Never attempt to operate a 120V specification product on 230V power, or vice versa, as this can cause irreparable damage to your equipment.
Power and control system checklist:
- Confirm voltage matches product specification
- Inspect power cable integrity
- Test remote control functionality
- Check battery levels in wireless controls
- Verify signal range and responsiveness
- Ensure electrical connections are secure
Remote control systems require meticulous attention. Wireless controls often operate on specific radio frequencies, so test your remote’s range and responsiveness before final installation. Position the receiver where it can receive clear signals without obstruction.
Pro tip: Always keep spare batteries for wireless controls and have a backup power connection method. Technical glitches can occur at the most inopportune moments, so being prepared ensures your mirror ball performance remains seamless and spectacular.
7. Perform a Final Safety and Functionality Inspection
A comprehensive final safety inspection is the ultimate safeguard between a spectacular mirror ball performance and a potential technical disaster. This crucial step transforms your meticulous preparation into a reliable, professional installation.
Systematic inspection protocols involve methodically examining every component of your mirror ball system. Look beyond surface level functionality and investigate each connection, mounting point, and operational mechanism with forensic attention to detail.
Critical inspection checklist:
- Verify all mounting hardware is fully secured
- Check cable connections for integrity
- Test motor rotation smoothness
- Confirm remote control responsiveness
- Inspect mirror surface for potential damage
- Evaluate lighting alignment and reflection quality
- Assess overall structural stability
Start your inspection by applying gentle pressure to mounting points and observing any unexpected movement. Listen carefully for unusual sounds during motor rotation that might indicate underlying mechanical issues. Comprehensive mirror ball setup techniques recommend a full operational test cycle before any public performance.
Pro tip: Document your inspection process with photographs or video. This provides a visual record of your system’s condition and can help diagnose any future performance issues. A thorough final check transforms potential risks into a seamless, stunning visual experience.
Below is a comprehensive table summarizing the main considerations and steps for installing a mirror ball as discussed throughout the article.
| Main Step | Key Points & Actions | Benefits/Outcomes |
|---|---|---|
| Assess Venue and Ceiling | Check ceiling material, load capacity, and hanging points; consult professionals if necessary | Ensures safety and effective structural support |
| Choose Mirror Ball and Accessories | Select size according to venue size; consider lighting and ambient conditions; use motor kits for rotation | Harmonises aesthetics with space; enhances visual impact |
| Select Secure Mounting Point | Use appropriate mounting hardware; ensure structural compatibility | Prevents equipment damage and safety risks |
| Install Motor Safely | Align and secure motor; test operation thoroughly | Guarantees smooth and safe performance |
| Position Lighting | Optimise angles and distances; utilise multiple sources | Maximises reflection and visual effects |
| Check Power Supply | Confirm voltage compatibility and test remote controls | Prevents electrical issues; ensures functionality |
| Perform Final Inspection | Verify all connections and secure all components | Ensures reliability and safety before performance |
Master Your Mirror Ball Setup With Expert Equipment and Guidance
Setting up the perfect mirror ball display can be challenging, especially when considering ceiling structures, motor installation, and optimal lighting placement. The concerns raised about secure mounting points, compatible accessories and final safety inspections reveal common pain points faced by both professionals and enthusiasts. Achieving a spectacular and safe mirror ball experience requires reliable, high-quality products and informed advice tailored to your venue and event needs.
Discover a vast selection of mirror balls and motorised accessories at mirror-balls.co.uk. Whether you need compact balls for intimate home parties or large professional-grade units for clubs and theatres, you will find expert-approved solutions designed for safety and stunning visual impact. Explore detailed product descriptions and setup tips in our Mirror Ball Buying Guide to ensure you select the right size and hardware. Elevate your lighting effects further with our range of mirror ball accessories crafted to bring your installation to life.
Don’t let installation worries hold back your show-stopping event. Start with the right equipment and professional advice from mirror-balls.co.uk today. Explore our expert range and make your mirror ball setup safe, impressive, and effortless.
Frequently Asked Questions
What factors should I consider when assessing the ceiling for a mirror ball installation?
Your venue’s ceiling material, height, and load-bearing capacity are crucial for a safe installation. Measure these factors carefully, and confirm there are sturdy hanging points, such as joists or beams, to securely support the mirror ball.
How do I choose the right size for my mirror ball?
Select your mirror ball size based on the venue’s dimensions and desired ambiance. For smaller spaces, a 10-centimetre ball might suffice, while larger venues may require a 40 or 50-centimetre option to create impactful light displays.
What types of mounting hardware do I need for a secure mirror ball setup?
You will need steel safety cables, swivel mounting brackets, and weight-rated carabiners, among other components, to ensure safety. Assess your ceiling structure to select the appropriate hardware, and always opt for redundant safety attachments to minimise risk.
How can I ensure my mirror ball motor is installed correctly?
Verify the ceiling’s structural integrity and select the right mounting brackets for the motor. Test the rotation of the mirror ball after installation to ensure smooth operation and address any mechanical issues before the event.
What is the best way to position lighting for optimal reflections from my mirror ball?
Position lights at 45-degree angles for maximum impact and use multiple sources to create a balanced distribution of light. Experiment with different angles and intensities to achieve stunning reflective patterns across the venue.
How can I conduct a final safety inspection before my mirror ball event?
Perform a thorough check of all mounting hardware, cable connections, and lighting alignment to ensure everything is securely in place. Document your inspection process to track any issues and help diagnose similar problems in the future.
Recommended
- Mirror Ball Maintenance Guide for Flawless Shine and Safety – Mirror Balls
- Mirror Ball Effect Creation: Step-by-Step Lighting Guide – Mirror Balls
- 2025 Mirror Ball Troubleshooting Guide for Perfect Events – Mirror Balls
- How to Wire Mirror Balls for Safe Event Installations – Mirror Balls
- Mirror Phone to Projector: Easy Ways for Malaysians 2025 – Projector Display